There are many different ways to deploy a website online. A dedicated server with Nginx or Apache, Github Pages and cloud service such as AWS or GCP can all do the trick. However, for a static website, a dedicated server might be a bit overkill as cloud service provides us a cheap, easy and sustainable way to deploy a static website. In this post, I will deploy a commercial website on AWS S3 bucket.
Prerequisite
- A domain name purchased from domain provider such as Godaddy or AWS Route53.
- A built static website.
Architecture
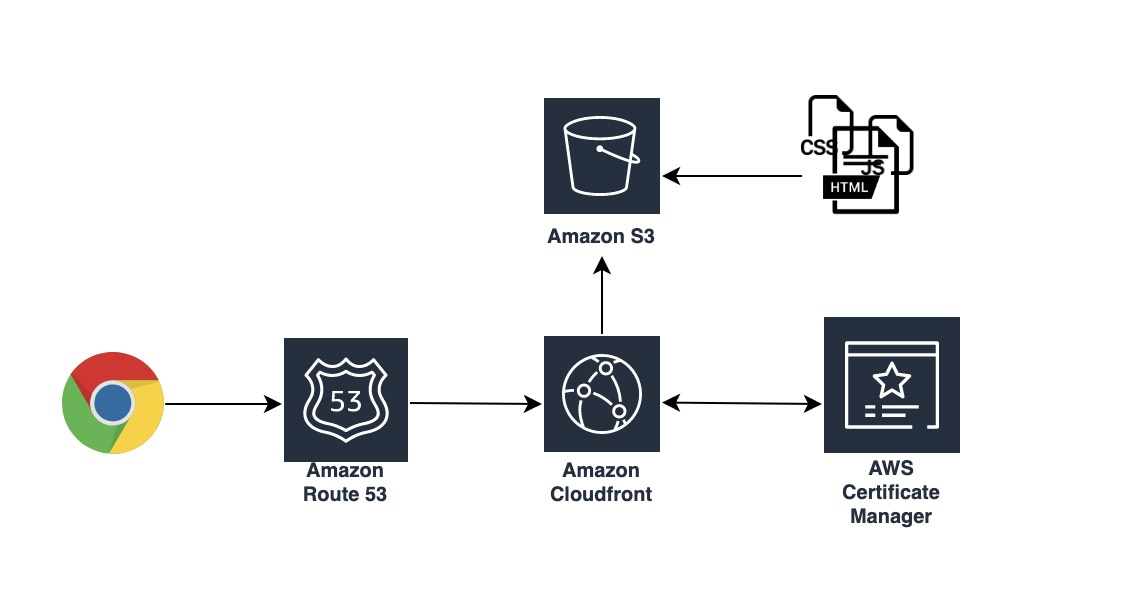
The overview of the project architecture will be like this:
Create an S3 bucket
Create an S3 bucket on AWS and de-select Block Public Access settings to make it accessible by the public.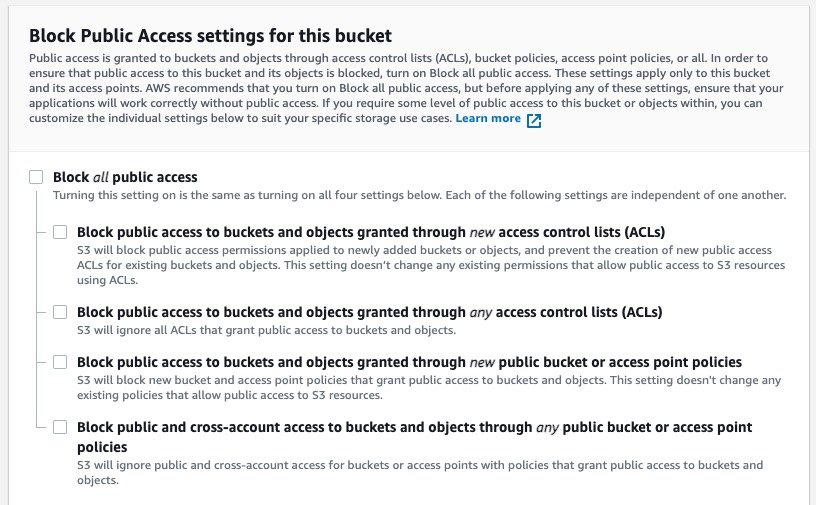
And then, upload website resources to S3 bucket. Make sure an entry html is included.
Also, we’ll need to create a bucket policy to allow PublicReadGetObject permission. Under the permission tab of the bucket, edit bucket policy to add this rule:
{
    "Version": "2012-10-17",
    "Statement": [
        {
            "Sid": "PublicReadGetObject",
            "Effect": "Allow",
            "Principal": "*",
            "Action": "s3:GetObject",
            "Resource": "arn:aws:s3:::myexample.com/*"
        }
    ]
}
Request an SSL certificate from Amazon Certificate Manager(ACM):
To use an ACM certificate with Amazon CloudFront, you must request or import the certificate in the US East (N. Virginia) region.
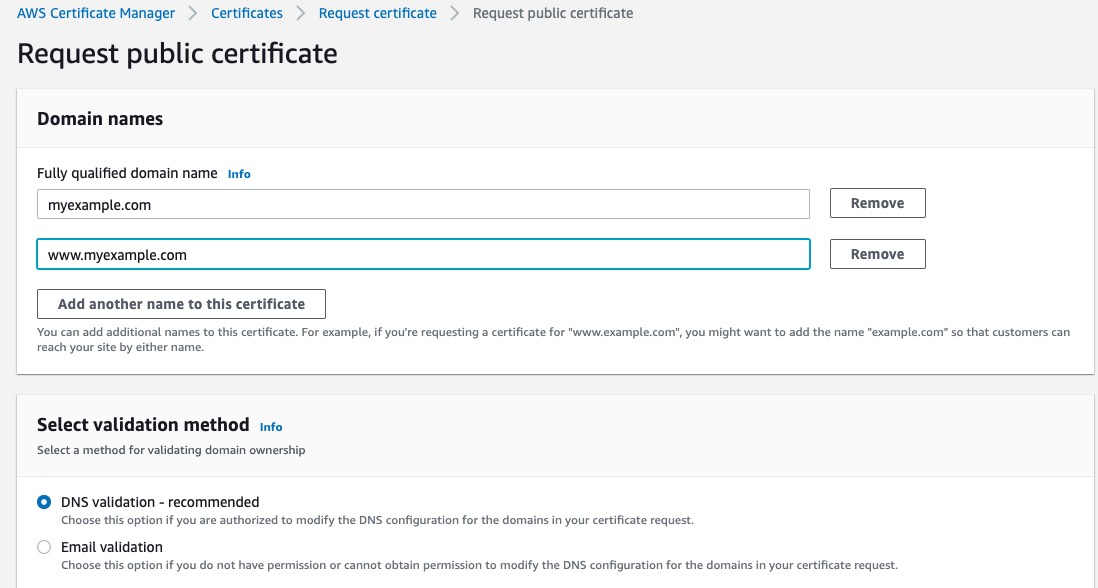
You will have CNAME key-value pairs generated for you to verify your domain. If you are using Route53 as a domain provider, simply click Create records in Route53. If you are using other providers such as godaddy, you will need to create these CNAME records so it can be verified.
Create a CloudFront distribution
Select the bucket for the Origin Domain. If your entry file is in a subfolder, you’ll need to put it in the Origin Path field.
Under the view settings, you you’d only allow https requests, you can select the Redirect HTTP to HTTPS option.
Add your domain name as alias in the Alternate domain name field.
Select the SSL certificate we just requested in the Custom SSL certificate field.
Put your default entry file(ex. index.html) in the Default root object field.
Once the distribution is created and enabled, click into the distribution from console and you’ll get the distribution domain name. You can configure your DNS using this domain name in Route53 or Godaddy.
I’m using Godaddy so it would be like this: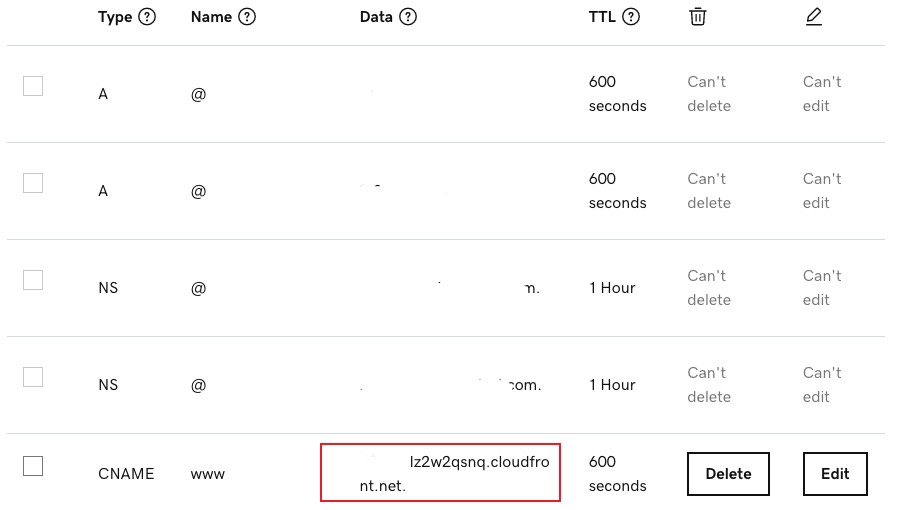
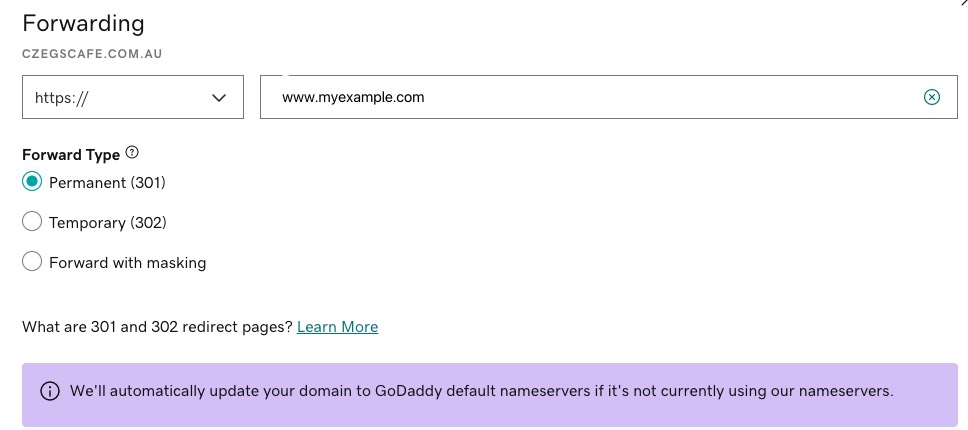
Redirect domain
If you want to redirect myexample.com to www.myexample.com which is just configured with CloudFront distribution domain, in Godaddy, you can create a Forwarding rule:
Invalidate CloudFront cache
Under Invalidation tab, click Create Invalidation and add object path into it: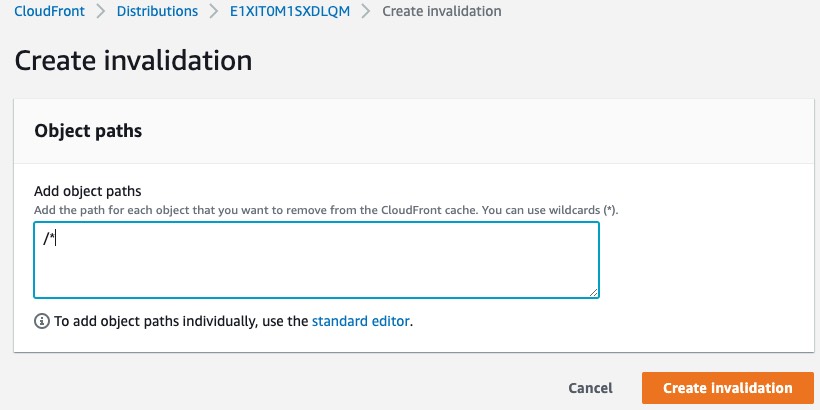
CORS issues
If you want to have encountered CORS issue when requesting static resources, you will need to configure the cloudFront distribution to forward the appropriate headers to the origin server - in this case the origin server is the S3 bucket.
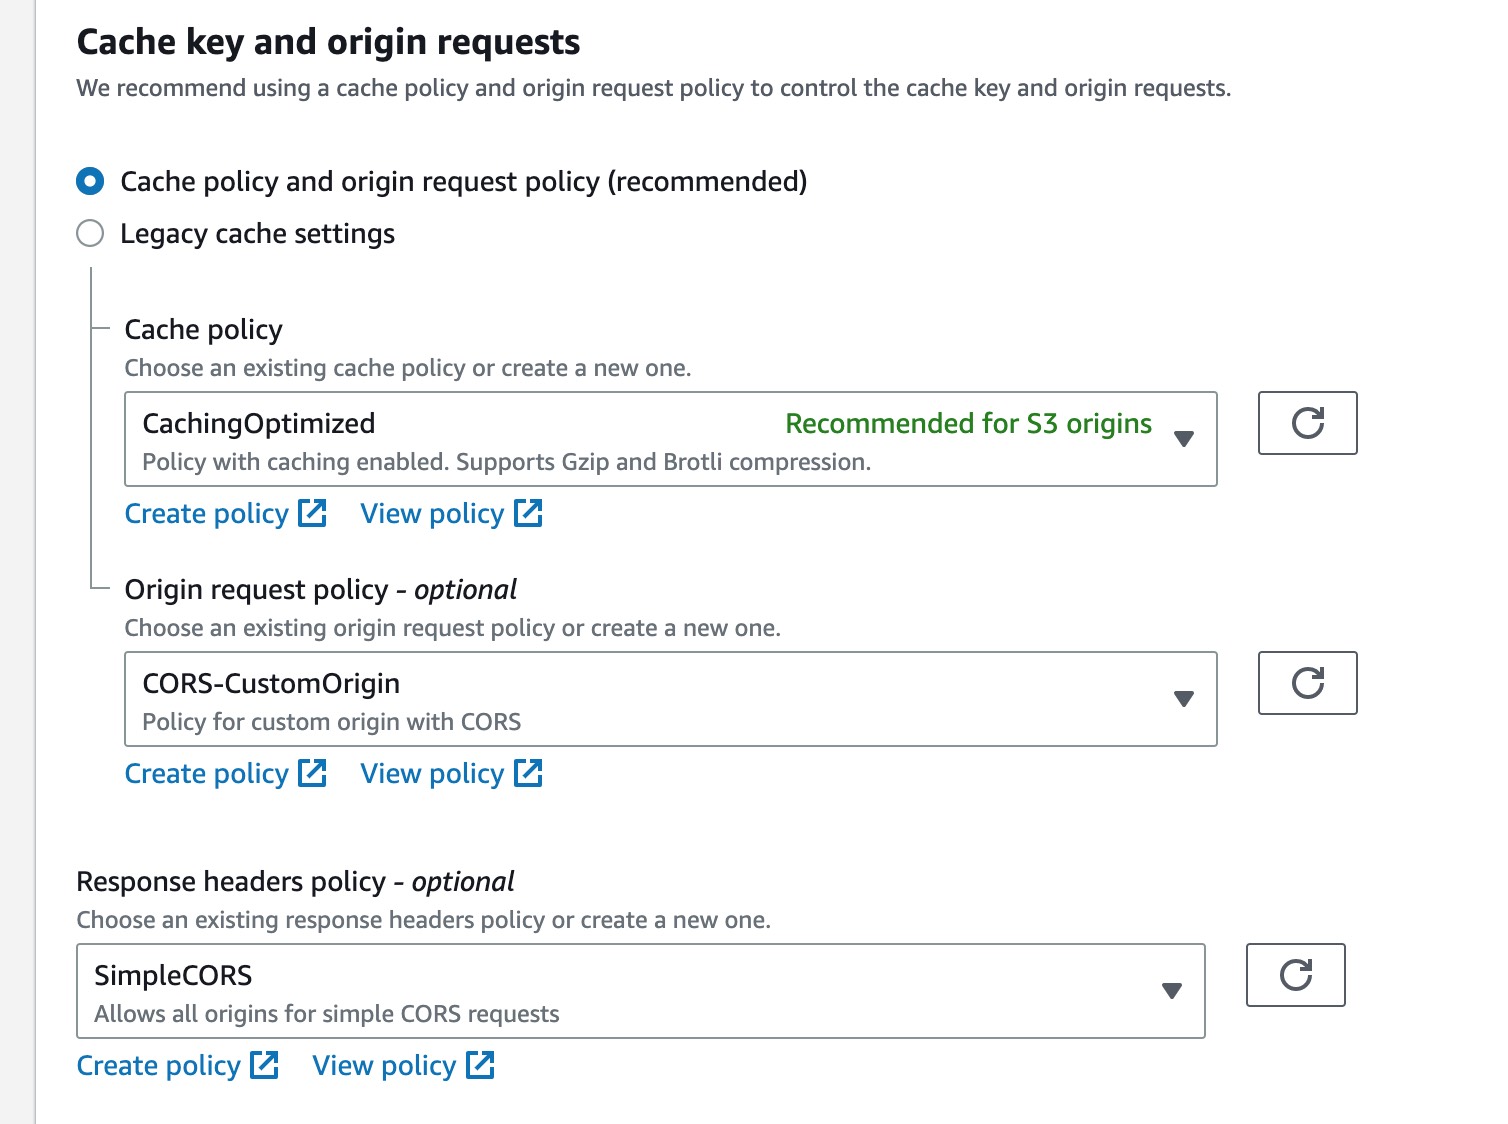
So you’ll need to go to Behaviors tab in CloudFront console, choose edit or create(if no behavior is added). Under Cache key and origin requests, choose Cache policy and origin request policy.
- For Cache policy, select CachingOptimized which is recommended for s3 origins;
- For Origin request policy, select CORS-S3Origin
- For Response headers policy, select SimpleCORS
See https://aws.amazon.com/premiumsupport/knowledge-center/no-access-control-allow-origin-error/ for more information.
Summarize
This basic deployment with AWS stack includes AWS S3, CloudFront and ACM to enable SSL encryption. What is worth noticing is the S3 bucket policy definition and the region of ACM certificate should be requested in N. Virginia to make it work with CloudFront.
What’s Next?
After we deploy the website online, we need to make it visible in search engines which is out of this post’s scope. I’ll be having another post relevant to that in the feature.
Reference
https://docs.aws.amazon.com/acm/latest/userguide/acm-regions.html
